

Assassin is the Thief second job that keeps throwing stars from a distance: Lucky Seven stays your attack, and the second-job kit makes every star crit harder, come back more often and fly faster. This page shows what to do with every point from level 30 to 70: skill points (SP) in order, ability points (AP) by level band, which claw and stars to carry, and where to train. Third job is not in MapleStory Classic World at launch, so this is the whole build.
 BranchThief, main stat LUK
 Advance atLv 30, Dark Lord, Kerning City
 WeaponClaw plus throwing stars
 SignatureCritical Throw, max 30
Your six skills
Everything an Assassin learns from level 30. Only Drain is an attack; the other five make Lucky Seven stronger, cheaper or faster.
 Claw MasteryMax 20 · passiveMore claw mastery and attack, plus a chance to recover the stars you throw. The root of the kit: level 3 opens Critical Throw, level 5 opens Booster.
- Critical ThrowMax 30 · needs Mastery 3Raises critical rate and critical damage on star attacks. Passive, so it works on every Lucky Seven.
 Claw BoosterMax 20 · needs Mastery 5Spends HP and MP to raise claw attack speed for a while. Cost falls from 30 MP to 10 as it levels.
 Critical RecoveryMax 20 · passiveA chance to recover HP and MP on a critical hit, once every 30 seconds. Three points here unlock Drain.
 DrainMax 30 · needs Critical Recovery 3240% damage to one target, and part of it comes back as HP, capped at 25% of your Max HP. 14 MP at level 1, 28 at max.
 HasteMax 20 · no prerequisiteSpeed and jump for you and the party around you. 15 MP at level 1, 35 at max. Utility, so it goes last.
Your first-job skills carry the whole stretch: Lucky Seven throws two stars at 120% each and scales on LUK, Nimble Body adds accuracy and avoid, and Keen Eyes stretches your range. Second-job SP cannot go into first-job skills, so arrive at level 30 with Lucky Seven 20, Nimble Body 15 and Keen Eyes 15.
SP: where each skill point goes
How SP works. You get 3 SP every level, 123 from level 30 to 70. The six skills add up to 140 levels, so 17 points of Critical Recovery stay unbought. Mastery gates the chain: Critical Throw opens at Mastery 3, Booster at Mastery 5, Drain at Critical Recovery 3. Damage first, utility last.
- Lv 30Claw Mastery +3Claw Mastery 3Claw Mastery 3 unlocks Critical Throw. Lucky Seven stays your attack, so the kit upgrades it rather than replacing it.
- Lv 31Claw Mastery +2Claw Booster +1Claw Mastery 5 · Claw Booster 1Mastery 5 unlocks Booster. One point so the attack speed buff is on your bar.
- Lv 32Critical Throw +3Claw Mastery 5 · Claw Booster 1 · Critical Throw 3Critical Throw raises critical rate and critical damage on every star you throw. It is the biggest upgrade in the kit, so it goes first.
- Lv 33Critical Throw +3Claw Mastery 5 · Claw Booster 1 · Critical Throw 6
- Lv 34Critical Throw +3Claw Mastery 5 · Claw Booster 1 · Critical Throw 9
- Lv 35Critical Throw +3Claw Mastery 5 · Claw Booster 1 · Critical Throw 12
- Lv 36Critical Throw +3Claw Mastery 5 · Claw Booster 1 · Critical Throw 15
- Lv 37Critical Throw +3Claw Mastery 5 · Claw Booster 1 · Critical Throw 18
- Lv 38Critical Throw +3Claw Mastery 5 · Claw Booster 1 · Critical Throw 21
- Lv 39Critical Throw +3Claw Mastery 5 · Claw Booster 1 · Critical Throw 24
- Lv 40Critical Throw +3Claw Mastery 5 · Claw Booster 1 · Critical Throw 27
- Lv 41Critical Throw +3 ✓Claw Mastery 5 · Claw Booster 1 · Critical Throw 30Critical Throw done.
- Lv 42Claw Mastery +3Claw Mastery 8 · Claw Booster 1 · Critical Throw 30
- Lv 43Claw Mastery +3Claw Mastery 11 · Claw Booster 1 · Critical Throw 30
- Lv 44Claw Mastery +3Claw Mastery 14 · Claw Booster 1 · Critical Throw 30
- Lv 45Claw Mastery +3Claw Mastery 17 · Claw Booster 1 · Critical Throw 30
- Lv 46Claw Mastery +3 ✓Claw Mastery 20 · Claw Booster 1 · Critical Throw 30Claw Mastery done: more attack and a chance to get thrown stars back, which saves mesos every trip.
- Lv 47Critical Recovery +3Claw Mastery 20 · Claw Booster 1 · Critical Throw 30 · Critical Recovery 3Critical Recovery 3 unlocks Drain. The other 17 points stay unspent; the kit has only 123 SP for 140 levels of skills.
- Lv 48Drain +3Claw Mastery 20 · Claw Booster 1 · Critical Throw 30 · Critical Recovery 3 · Drain 3Drain: 240% on one target and part of the damage comes back as HP (capped at 25% of your Max HP). Costs 14 MP here, 28 at max.
- Lv 49Drain +3Claw Mastery 20 · Claw Booster 1 · Critical Throw 30 · Critical Recovery 3 · Drain 6
- Lv 50Drain +3Claw Mastery 20 · Claw Booster 1 · Critical Throw 30 · Critical Recovery 3 · Drain 9
- Lv 51Drain +3Claw Mastery 20 · Claw Booster 1 · Critical Throw 30 · Critical Recovery 3 · Drain 12
- Lv 52Drain +3Claw Mastery 20 · Claw Booster 1 · Critical Throw 30 · Critical Recovery 3 · Drain 15
- Lv 53Drain +3Claw Mastery 20 · Claw Booster 1 · Critical Throw 30 · Critical Recovery 3 · Drain 18
- Lv 54Drain +3Claw Mastery 20 · Claw Booster 1 · Critical Throw 30 · Critical Recovery 3 · Drain 21
- Lv 55Drain +3Claw Mastery 20 · Claw Booster 1 · Critical Throw 30 · Critical Recovery 3 · Drain 24
- Lv 56Drain +3Claw Mastery 20 · Claw Booster 1 · Critical Throw 30 · Critical Recovery 3 · Drain 27
- Lv 57Drain +3 ✓Claw Mastery 20 · Claw Booster 1 · Critical Throw 30 · Critical Recovery 3 · Drain 30Drain done.
- Lv 58Claw Booster +3Claw Mastery 20 · Claw Booster 4 · Critical Throw 30 · Critical Recovery 3 · Drain 30
- Lv 59Claw Booster +3Claw Mastery 20 · Claw Booster 7 · Critical Throw 30 · Critical Recovery 3 · Drain 30
- Lv 60Claw Booster +3Claw Mastery 20 · Claw Booster 10 · Critical Throw 30 · Critical Recovery 3 · Drain 30
- Lv 61Claw Booster +3Claw Mastery 20 · Claw Booster 13 · Critical Throw 30 · Critical Recovery 3 · Drain 30
- Lv 62Claw Booster +3Claw Mastery 20 · Claw Booster 16 · Critical Throw 30 · Critical Recovery 3 · Drain 30
- Lv 63Claw Booster +3Claw Mastery 20 · Claw Booster 19 · Critical Throw 30 · Critical Recovery 3 · Drain 30Booster climbs toward 10 MP a cast.
- Lv 64Claw Booster +1 ✓Haste +2Claw Mastery 20 · Claw Booster 20 · Critical Throw 30 · Critical Recovery 3 · Drain 30 · Haste 2Booster done: cheapest at max. Haste begins.
- Lv 65Haste +3Claw Mastery 20 · Claw Booster 20 · Critical Throw 30 · Critical Recovery 3 · Drain 30 · Haste 5
- Lv 66Haste +3Claw Mastery 20 · Claw Booster 20 · Critical Throw 30 · Critical Recovery 3 · Drain 30 · Haste 8
- Lv 67Haste +3Claw Mastery 20 · Claw Booster 20 · Critical Throw 30 · Critical Recovery 3 · Drain 30 · Haste 11
- Lv 68Haste +3Claw Mastery 20 · Claw Booster 20 · Critical Throw 30 · Critical Recovery 3 · Drain 30 · Haste 14
- Lv 69Haste +3Claw Mastery 20 · Claw Booster 20 · Critical Throw 30 · Critical Recovery 3 · Drain 30 · Haste 17
- Lv 70Haste +3 ✓Claw Mastery 20 · Claw Booster 20 · Critical Throw 30 · Critical Recovery 3 · Drain 30 · Haste 20Haste done: speed and jump for the whole party. Every point is spent.
One detour. If you train in a party that wants Haste early, move the Haste block up to levels 58 to 64 and push Booster to the end. Booster is cheapest at max, so finishing it late costs you some MP per cast in the meantime, nothing more.

 Subi 15
 Wolbi 17
 Mokbi 19
 Kumbi 21
 Tobi 23
 Steely 25
 Hwabi 29

 Lv 30 to 35
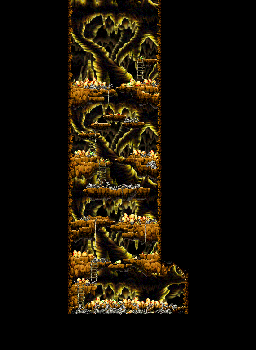
 Lv 30 to 35

 Short stop, Lv 30+

 Lv 32 to 40
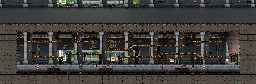
 Lv 35 to 45

 Lv 42+


